
TM 1-4920-434-13&P
0025 00
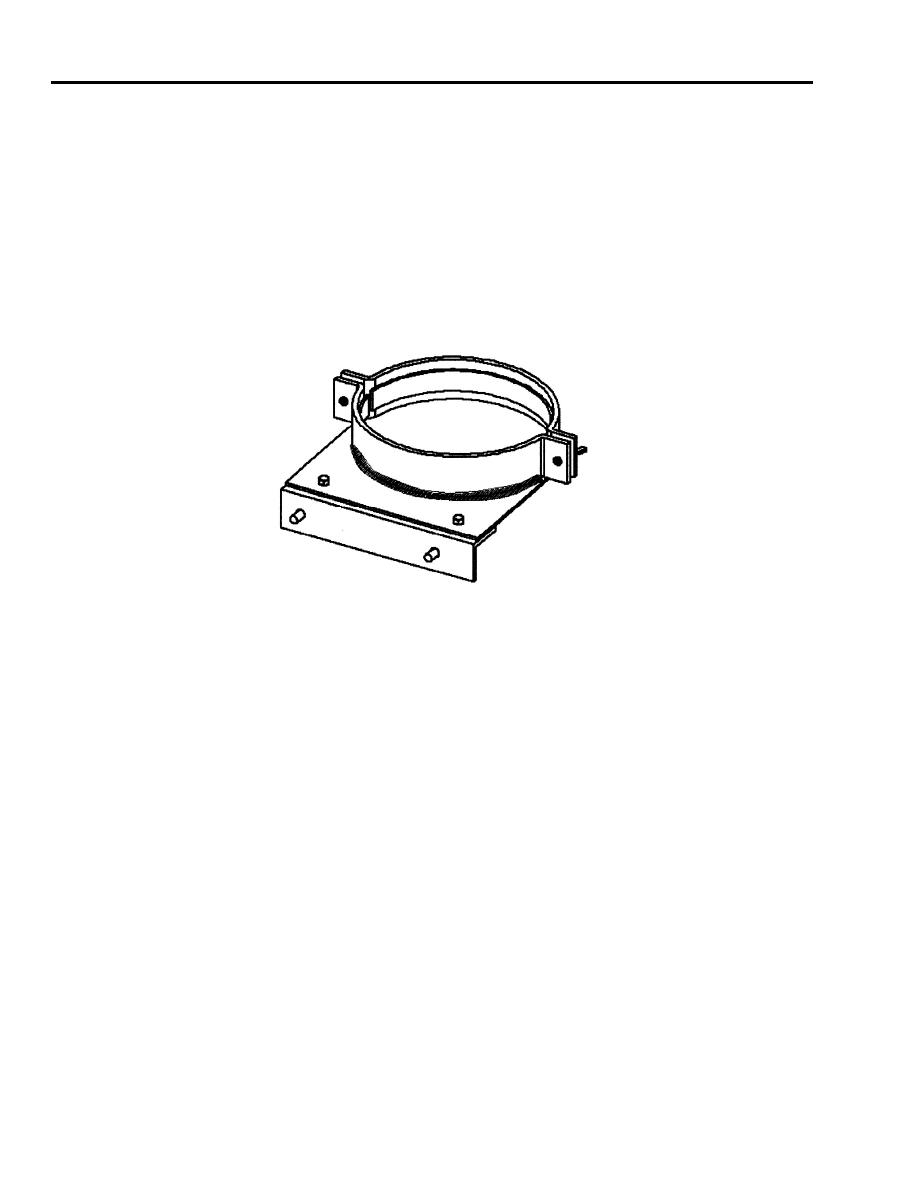
REMOVE
1. Remove two wing nuts attaching removable cylinder ring to fixed cylinder ring.
2. Store wing nuts in cotton mailing bag.
3. Remove two bolts with lock washers and flat washers attaching bracket to wall.
4. Store hardware in cotton mailing bag.
5. Remove two bolts, lock washer, flat washers, and nuts attaching ring assembly brace to bracket.
REPAIR
1. Prepare and weld cracked or broken welds in accordance with MIL-STD-2219. Welding repair must not
interfere with form, fit, or function of cylinder.
2. If cylinder rings are bent, try to reshape by using the anvil horn and a steel hammer.
3. If single cylinder bracket assembly is damaged beyond repair, replace with a new one.
INSTALL
1. Attach ring assembly brace to bracket with bolts, lock washers, flat washers, and nuts obtained from cotton
mailing bag.
2. Mount single cylinder bracket assembly in its original location on wall using bolts, lock washers, and flat
washers obtained from cotton mailing bag.
3. Attach removable cylinder ring to fixed cylinder ring with two wing nuts obtained from cotton mailing bag.
0025 00-16
