
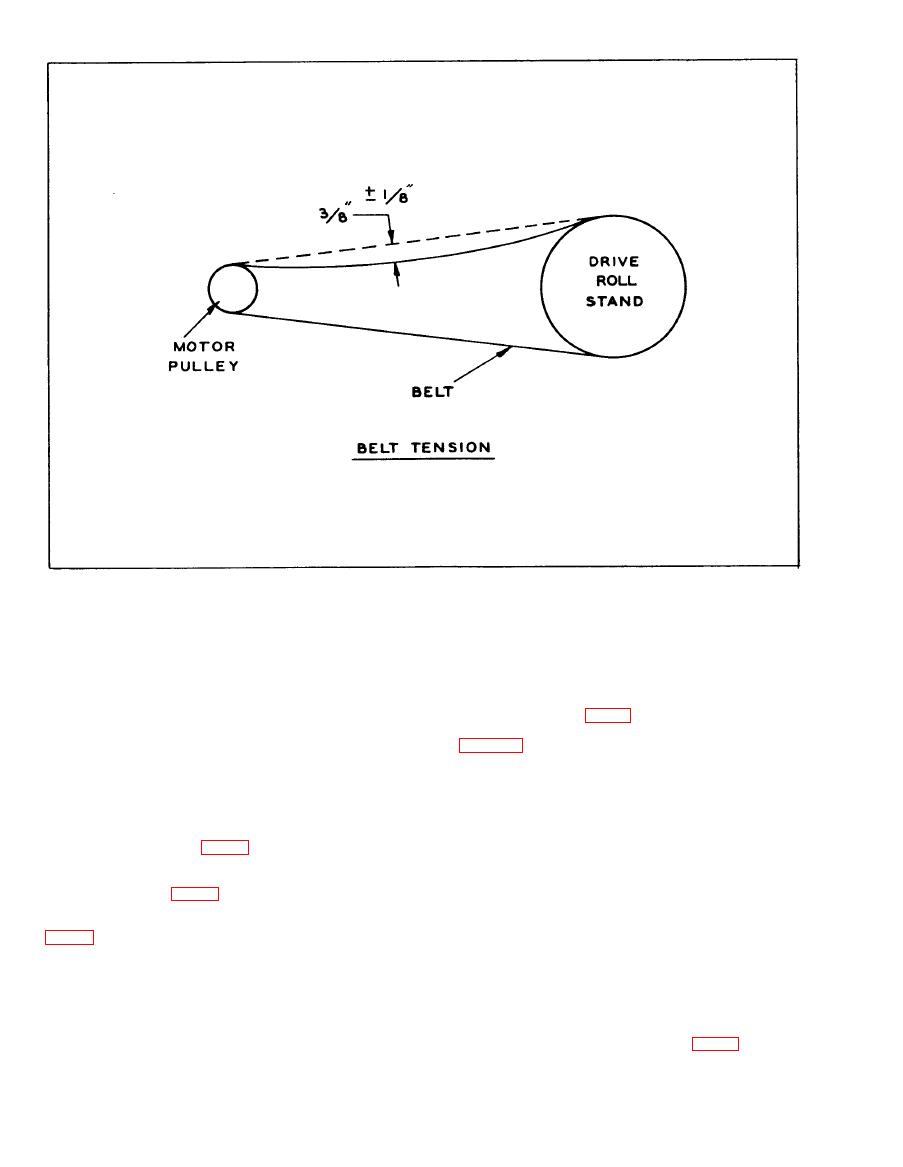
Figure 16. Adjustment Point for Timing Belt
b. Check timing belt for proper tension.
adjustment of the timing belt tension. To replace the
belt, it is not necessary to disturb this adjustment.
c. Check hose connections for leaks. Make sure
The belt is eased off the pulleys and removed when
cables are secure.
the adapter is taken off the motor. Belt adjustment,
however, is necessary whenever a motor is replaced.
At least every 60 days check the Feeder as follows:
Adjust the timing belt (Fig. 15) by turning the motor
mounting bolts until the tension on the belt is as shown
a. Wipe away any dust, dirt and grime from Feeder.
in Figure 16. Make sure the motor is approximately
Use an air hose, if necessary, to blow it out.
parallel to the motor support, or the belt may run off
the drive roll pulley.
b. Tighten all loose wire connections. Repair or
replace any wiring with damaged insulation.
c. Tighten all mounting hardware.
4.4 BRAKE ADJUSTMENT
d. Replace timing belt (Fig. 15) if worn or frayed.
Check for proper belt tension.
To adjust the brake to increase or decrease the amount
of friction between the brake shoe and the hub brake
e. Check brake (Fig. 13) for proper adjustment.
wheel or to compensate for brake shoe wear, proceed
as follows:
f. Lubricate gear chamber of drive roll housing
a. Unlock and open hinged cover.
g. Make sure all switches are serviceable and wire
feed speed dial and potentiometer function properly.
b. Place lock lever of hub in vertical position. Re-
move wire reel.
4.3 REPLACING AND ADJUSTING TIMING BELT
The motor is mounted on a spring-loaded plate held on
c. Turn the brake adjusting screw (Fig. 13) until
a support of the carriage. This arrangement enables
b r a k e shoe makes light contact with the wheel.
52

