
2.4 FLEXIBLE SHAFT
Connect the flexible shaft to the Gun as follows:
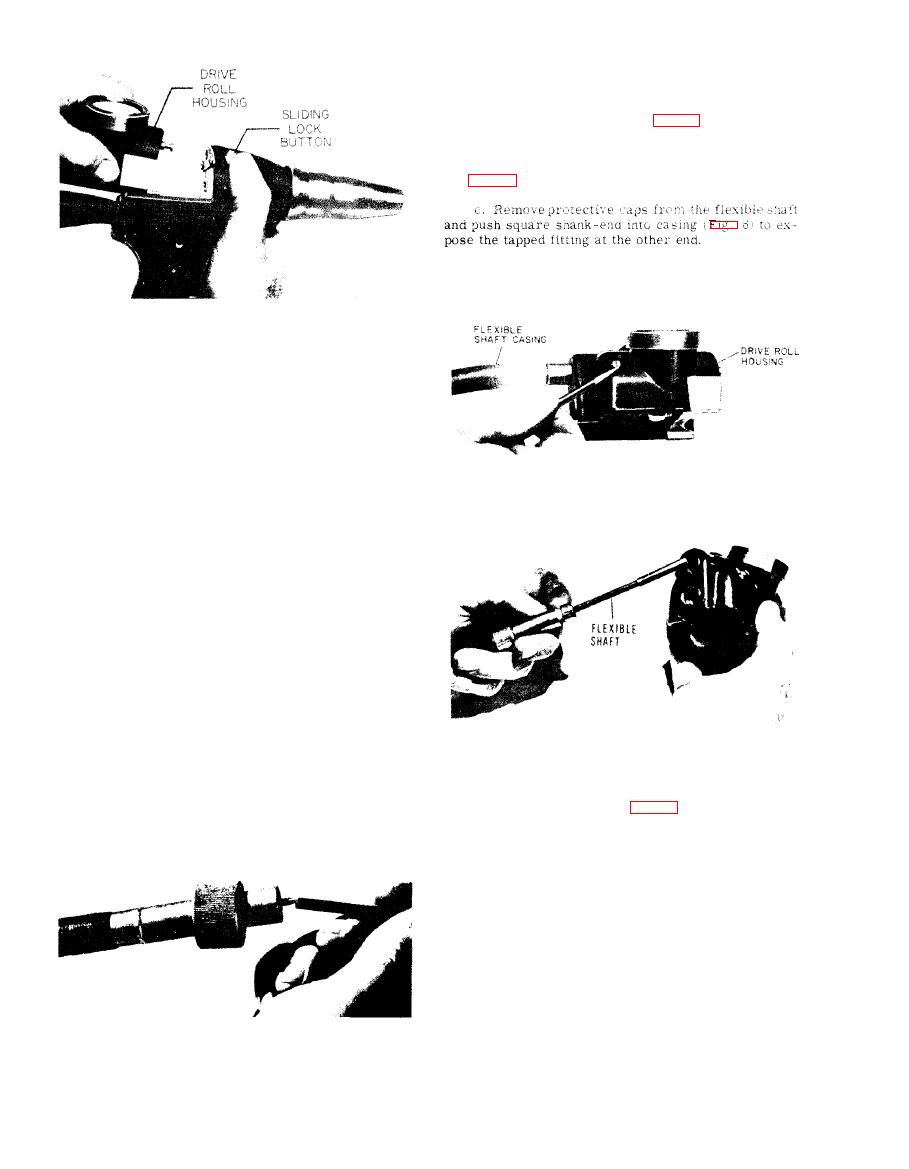
a. Press down lock button (Fig. 4) on right s i d e
of Gun. Slide off drive roll housing.
b. Remove screw on right side of drive roll hous -
ing (Fig. 5).
i. Solder black wire control cable assembly
(taped when not used) to open terminal of jog switch.
j. Check action of the jog switch.
k. Fit mounting plate of jog switch into its retain-
ing groove at base of right-hand handle assembly.
l. Check the trigger and its switch for proper op-
Shaft Casing
eration.
m. Make sure spring on drive roll housing lock
and springs in trigger have not slipped out of position.
n. Fit left-hand handle over end of lock pin and
s p r i n g and onto right-hand handle assembly. Align
mounting holes.
o. Secure these assemblies with hardware re-
moved in step e.
p. Tighten jog switch nut.
q. Screw on barrel lock nut and tighten.
r. Screw on nozzle and tighten.
s. Slide and lock drive roll housing onto Gun. Ad-
Drive RoII Housing
just position of drive roll housing retainer if neces-
sary.
d. Insert left-hand tapped end of flexible shaft into
top hole of drive roll housing (Fig. 7) to engage end of
worm shaft within housing.
e. Turn housing counterclockwise so that worm
will screw into left-hand thread of flexible shaft. Hand
tight en.
f. Slide casing of flexible shaft into housing hole
as far as it `will go.
g. Secure casing with screw removed in step b.
--
h. Straighten flexible shaft.
NOTE: Do not lock drive roll housing
on Gun until wire and wire guide fit-
tings are installed.
24

