
0007 00
TM 1-4920-445-13&P
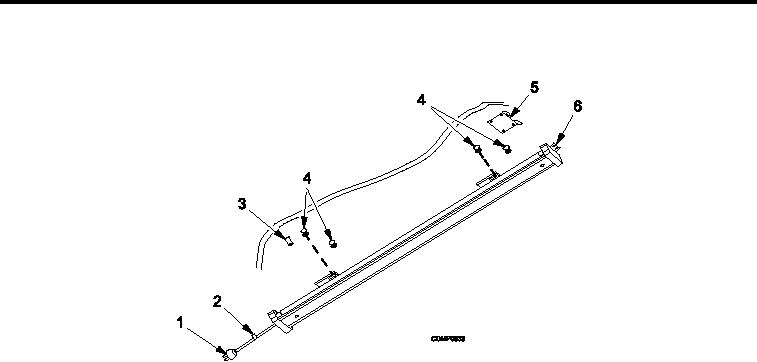
INSTALLING CEILING LIGHTS - CONTINUED
1.
Set main circuit breaker and all other circuit breakers in breaker panel to the OFF position.
Figure 2.
Installing Ceiling Lights.
2.
Remove power cable (Figure 2, Item 1) from storage clip (Figure 2, Item 2) on ceiling.
3.
Press and hold plunger lock (Figure 2, Item 3).
4.
Move entire light ixture (Figure 2, Item 6) lengthwise toward power cable (Figure 2, Item 1) end to disengage
light (Figure 2, Item 6) from four captive studs (Figure 2, Item 4) and light storage bracket (Figure 2, Item 5) in
ixed roof.
5.
Move light ixture (Figure 2, Item 6) into expandable section and rotate 180 degrees. Mate with four captive
studs (Figure 2, Item 4) and light storage bracket (Figure 2, Item 5) in hinged roof.
6.
Secure light ixture (Figure 2, Item 6) by moving until plunger lock (Figure 2, Item 3) engages.
0007 00-2

